Aprilaire 700 Installation Manual: A Comprehensive Guide
Embark on a journey towards optimal home humidification with our comprehensive guide to installing the Aprilaire 700 humidifier! This manual is your key to unlocking a healthier, more comfortable living environment, providing step-by-step instructions and expert tips for seamless installation and operation.
The Aprilaire 700 whole-house humidifier is a fan-powered, evaporative humidifier designed to integrate seamlessly with your home’s central heating and cooling system. It operates by drawing warm air from the furnace, passing it through a saturated water panel, and then distributing humidified air throughout your home via the ductwork. This process helps maintain optimal humidity levels, especially during dry winter months, contributing to improved comfort, health, and preservation of your home’s wooden furnishings.
The Aprilaire 700 is known for its high capacity, capable of humidifying homes up to 4,200 square feet, and its efficient operation. Unlike bypass humidifiers, the fan-powered design of the Aprilaire 700 allows for independent operation, regardless of furnace activity. This ensures consistent humidity levels even when the furnace is not actively heating. The unit requires annual maintenance, primarily involving the replacement of the water panel, and offers a simple, user-friendly interface for setting and monitoring humidity levels.
Installation is a straightforward process, often recommended to be performed by an HVAC professional, but can be accomplished by a confident DIYer with the proper tools and understanding of the instructions. This manual provides a comprehensive guide to the installation process, ensuring a smooth and successful setup.
Key Features and Benefits of the Aprilaire 700
The Aprilaire 700 stands out in the realm of whole-house humidifiers due to its numerous features and associated benefits. A primary advantage is its large capacity, capable of effectively humidifying homes up to 4,200 square feet, making it suitable for larger residences where maintaining consistent humidity levels can be challenging. Its fan-powered design allows independent operation, ensuring humidity is added to the air even when the furnace isn’t running, unlike bypass models.
Another key feature is its automatic control, which adjusts humidity levels based on outdoor temperature, preventing condensation and maintaining optimal comfort. The Aprilaire 700 delivers up to 50% more moisture compared to competitively priced units, enhancing its efficiency and effectiveness. The unit also offers vital service indicators, displaying temperature and relative humidity in manual mode.
Furthermore, the Aprilaire 700 operates quietly and requires simple annual maintenance, primarily involving replacing the water panel. This makes it a user-friendly and low-maintenance solution for whole-house humidification. By maintaining proper humidity levels, the Aprilaire 700 helps to alleviate dry skin, reduce static electricity, protect wood floors and furniture, and improve overall indoor air quality, contributing to a healthier and more comfortable living environment.
Pre-Installation Checklist and Considerations
Before embarking on the Aprilaire 700 humidifier installation, a thorough pre-installation checklist is crucial for a smooth and successful process. Firstly, determine the optimal mounting location. The supply side vertical duct is generally preferred, but the return side can be an alternative if necessary, evaluating accessibility for future maintenance is key, ensure sufficient clearance around the chosen location for easy access.
Next, verify compatibility with your HVAC system. The Aprilaire 700 is designed to work in conjunction with the furnace blower, so confirm your system’s specifications align with the humidifier’s requirements. Inspect the ductwork for any existing issues such as leaks or damage and address them before installation to prevent humidity loss.
Consider the proximity to a water supply and drain. The humidifier needs a water line connection and a drain for excess water, so ensure these are within a reasonable distance. If not, you may need to extend the water line or install a condensate pump. Finally, gather all necessary tools and materials, including the installation kit and any additional components based on your specific setup. Reviewing the complete installation manual beforehand will provide a comprehensive understanding of the process.
Tools and Materials Required for Installation
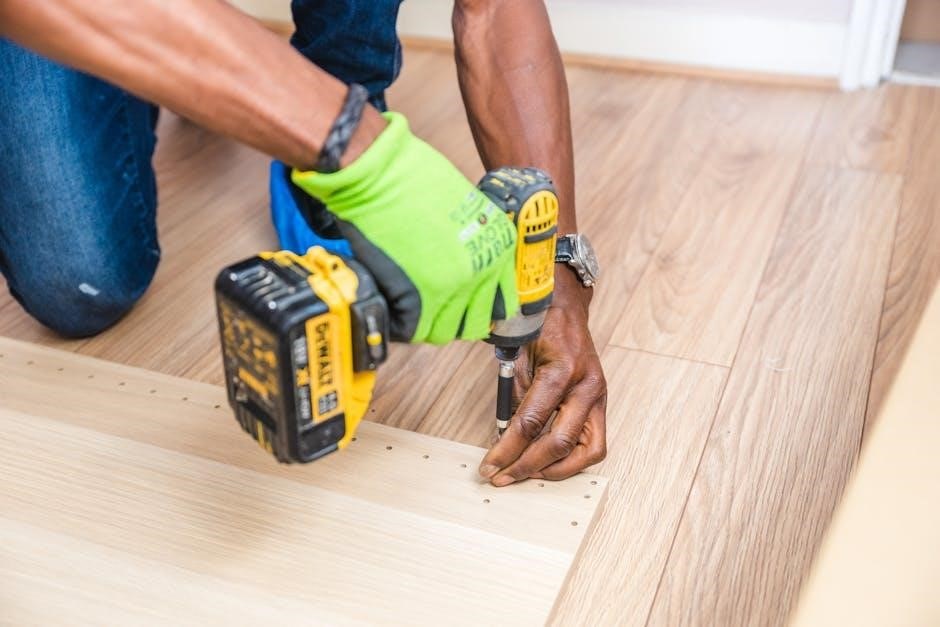
To ensure a smooth and efficient installation of your Aprilaire 700 humidifier, gathering the necessary tools and materials beforehand is essential. Firstly, you’ll need a reliable drill with various drill bits for making holes in the ductwork and mounting the humidifier. Sheet metal screws are crucial for securely attaching the humidifier and its components to the duct.
A sharp utility knife or metal snips will be needed for cutting the necessary openings in the ductwork. Don’t forget safety glasses to protect your eyes from debris during cutting and drilling. A level will guarantee that the humidifier is installed straight, ensuring proper water distribution and operation.
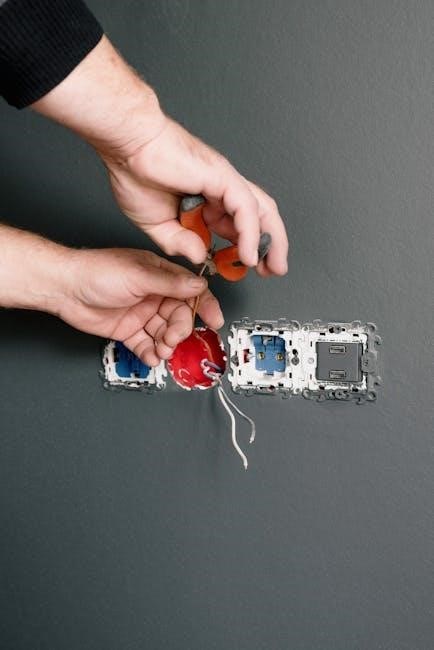
For plumbing connections, have a pipe cutter, pipe wrench, and appropriate fittings to connect the water supply line to the humidifier. A drain hose is also needed to direct excess water to a suitable drain location. Electrical tools such as wire strippers, wire connectors, and a multimeter are essential for wiring the humidifier to the HVAC system. A voltage tester will help ensure that the power is off before working on any electrical components. Finally, refer to the Aprilaire 700 installation kit for any specific parts or components included, and ensure you have them on hand.

Step-by-Step Installation Guide
Begin by carefully selecting the installation location on your HVAC ductwork, preferably on the supply side for optimal performance, as some directions advice. Use the provided template to accurately mark and cut the opening for the humidifier. Mount the Aprilaire 700 securely to the duct using sheet metal screws, ensuring it is level for proper water distribution, as one must be aware of the orientation of the cooling coils.
Next, connect the water supply line to the humidifier’s water inlet, ensuring a tight and leak-free connection using appropriate fittings. Run a drain hose from the humidifier’s drain outlet to a suitable drain location, securing it properly to prevent any water leakage. Proceed with the electrical wiring, carefully following the wiring diagram provided in the manual.
Connect the humidifier to the HVAC system’s control panel, ensuring all connections are secure and properly insulated. Once the wiring is complete, turn on the water supply and check for any leaks in the connections. Finally, power on the HVAC system and test the humidifier to ensure it is functioning correctly, verify humidification by testing it in test mode. Adjust the humidity settings according to your desired level of comfort.
Wiring the Aprilaire 700 Humidifier
Properly wiring the Aprilaire 700 is crucial for its operation. Begin by locating the wiring diagram included with the humidifier; this diagram provides a comprehensive overview of the connections required. Typically, the Aprilaire 700 requires a 24V power source, which can be obtained from your furnace’s control board or a separate transformer.

Identify the appropriate terminals on your furnace control board, usually labeled “HUM” or “HUMIDIFIER,” and connect the corresponding wires from the Aprilaire 700. If using a separate transformer, ensure it is properly sized and wired according to local electrical codes. Connect the transformer’s output to the humidifier’s power input terminals, paying close attention to polarity.
For humidistat control, connect the humidistat wires to the designated terminals on the Aprilaire 700 and the furnace control board. Ensure all wire connections are secure and properly insulated to prevent shorts or electrical hazards. Double-check the wiring diagram to confirm all connections are correct before powering on the system. Incorrect wiring can damage the humidifier or the furnace control board, so precision is key. Finally, secure all wires neatly and safely away from any moving parts or heat sources.
Connecting to Water Supply and Drain
Establishing a reliable water supply and drain for your Aprilaire 700 humidifier is essential for proper functionality. Begin by identifying a suitable cold water supply line near the humidifier’s installation location. Use a saddle valve or a T-fitting to tap into the water line, ensuring the connection is secure and leak-free. Install a shut-off valve on the supply line to allow for easy maintenance and repairs.
Next, connect the water supply tubing from the shut-off valve to the humidifier’s water inlet. Use the appropriate fittings and ensure the tubing is properly secured to prevent leaks. The Aprilaire 700 requires a drain line to remove excess water. Locate a suitable drain near the humidifier, such as a floor drain or a condensate drain line.
Connect the drain tubing from the humidifier’s drain outlet to the chosen drain location. Ensure the drain line has a continuous downward slope to prevent backflow and ensure proper drainage. Secure the drain tubing with clamps or zip ties to prevent it from coming loose. Test the water supply and drain connections for leaks before operating the humidifier. Address any leaks immediately to prevent water damage and ensure efficient operation.
Setting Up the Humidifier Control
Configuring the humidifier control is crucial for optimal performance of your Aprilaire 700. The control allows you to regulate the humidity level in your home, ensuring comfort and preventing damage from excessive moisture. Begin by mounting the control in a convenient location, typically on the return duct, following the manufacturer’s instructions for secure installation.
Once mounted, wire the control according to the wiring diagram provided in the installation manual. Pay close attention to the connections to ensure proper functionality. After wiring, power on the control and navigate the menu to set the desired humidity level. Consider factors such as outdoor temperature and personal preferences when selecting the humidity setting.
The Aprilaire 700 control often includes features such as automatic mode, which adjusts humidity based on outdoor temperature, and manual mode, which allows for direct control. Familiarize yourself with these features to customize the humidifier’s operation to your specific needs. Regularly monitor the humidity level and adjust the control settings as necessary to maintain a comfortable and healthy indoor environment. Proper setup of the humidifier control will ensure efficient and effective humidification throughout your home.
Testing the Humidifier After Installation
After completing the installation of your Aprilaire 700 humidifier, thorough testing is paramount to ensure proper functionality and prevent potential issues. Begin by powering on the humidifier and setting the humidistat to a level higher than the current humidity in your home. This will trigger the humidifier to start operating.
Carefully observe the water panel to confirm that water is flowing evenly and saturating the pad. Check for any leaks around the humidifier unit, water lines, and drain connections. Verify that the blower fan is operating smoothly and distributing humidified air throughout your ductwork. Monitor the humidity level in your home using a reliable hygrometer to confirm that the humidifier is effectively increasing the humidity.
It’s also wise to test the automatic mode, if available, by simulating different outdoor temperatures and observing how the humidifier adjusts its output. If any issues arise during testing, consult the troubleshooting section of the installation manual or contact a qualified HVAC technician for assistance. Successful testing will give you confidence in your Aprilaire 700 humidifier’s performance and ensure a comfortable and healthy indoor environment.
Troubleshooting Common Installation Issues
Even with careful adherence to the installation manual, unforeseen challenges can arise during the Aprilaire 700 humidifier setup. One common issue is water leakage, which can stem from loose connections, damaged tubing, or an improperly seated water panel. Ensure all fittings are tightened securely and inspect the water lines for any cracks or punctures. If the humidifier fails to turn on, verify that the power supply is active and the humidistat is properly wired and set to a call for humidity.
Another potential problem is inadequate humidification. This could be due to insufficient water flow, a clogged water panel, or an improperly sized unit for your home. Check the water supply valve to ensure it’s fully open and inspect the water panel for mineral buildup or debris. If the air isn’t circulating properly, inspect the ductwork connections. Excessive noise during operation can indicate a misaligned blower fan or loose components.
Consult the wiring diagrams and double-check all electrical connections to resolve wiring issues. If these troubleshooting steps don’t resolve the problem, consider contacting a qualified HVAC technician for professional assistance. Remember to always prioritize safety and disconnect power before working on any electrical components.
Maintenance and Annual Servicing
To ensure the continued efficient operation of your Aprilaire 700 humidifier, regular maintenance and annual servicing are essential. The most critical aspect of maintenance is replacing the water panel, also known as the humidifier filter, annually. Mineral deposits accumulate on the panel over time, reducing its ability to effectively evaporate water and impacting the humidifier’s performance.
Before each heating season, inspect the water distribution tray and pad frame for any buildup of mineral deposits or debris. Clean these components thoroughly with a mild detergent and water. Check the water supply line for leaks or damage and replace as needed. Inspect the drain line to ensure it is clear and free of obstructions.
Consider having a qualified HVAC technician perform a comprehensive annual servicing. This includes inspecting the electrical components, checking the humidistat calibration, and ensuring the humidifier is operating within its specified parameters. Proper maintenance not only extends the lifespan of your Aprilaire 700 but also ensures optimal humidification, contributing to a healthier and more comfortable home environment. Furthermore, keep an eye on temperature and relative humidity indicators.
Safety Precautions During Installation and Operation
Prioritizing safety is paramount during the installation and operation of your Aprilaire 700 humidifier. Before commencing any work, always disconnect the power supply to the furnace and humidifier to prevent electrical shock. Wear appropriate personal protective equipment, including safety glasses and gloves, to safeguard against potential hazards.
When working with electrical wiring, ensure that all connections are secure and comply with local electrical codes. Never work with live wires. When drilling into ductwork, be mindful of hidden pipes or wires behind the surface. Exercise caution when handling sharp tools or materials.
During operation, be aware of the potential for scalding from hot water. Avoid touching the humidifier components while it is running. Regularly inspect the humidifier for leaks or malfunctions. If any issues are detected, immediately turn off the unit and consult a qualified HVAC technician. Keep the area around the humidifier clear of obstructions to ensure proper ventilation and prevent overheating. Always adhere to the manufacturer’s instructions and guidelines for safe installation and operation to minimize risks and ensure optimal performance;
